S3 Image Processing Lambda
Using S3 and Lambda to automatically resize and convert images
The Problem
One area that my colleagues and I have been working on recently is improving the performance of our web site. As well as lowering the javascript execution time and the affect that third parties have on the site, image management has been one area of focus.
I work with people in different areas such as merchandising, commercial, business, SEO e.t.c. Many of them require the ability to edit content on the site including the addition of images which has become a problematic process for us. Controlling the quality, format and size of the images added to the site has proven to be impossible since not everyone understands the importance of using certain formats and the correct image sizes.
Another hurdle that we have been trying to overcome is how images are added to the site. We store many of our images on a static S3 bucket. The upload of these images to the bucket is performed via an S3 sync process that sync’s the images from a git repository. This is troublesome as it requires non technical people to learn git and have an understanding of how git works as well as our internal git process with regards to pull requests. We need to provide a mechanism that would resize an image before it is added to the static S3 Bucket.
The First Solution
Our first attempt at providing a process to resize images came in the form of a node.js script that would automatically run and resize images using the npm sharp module whenever someone committed a local change in the git repository. This worked to a certain extent but with the problem that the script would process all images rather than just the images that had been added. This also didn’t remove the issue around non technical people not being able to use git. We would rather implement a solution that was not only automatic but would also only process files that are added to the S3 Bucket, and remove the need to have a knowledge of git when adding an image.
The Final Solution
We decided that we needed to remove the reliance on a git repository and felt that the S3 user interface would provide a better user experience than a terminal or a git GUI. Once the user had added the new image to the S3 Bucket, the image would have to be processed and resized. We had already used S3 trigger events with lambdas for other processes in our stack and believed it to be a good fit for this type of problem. This would involve the invocation of an image processing lambda whenever an image was added to the S3 Bucket. To avoid an infinite invocation of the lambda, the user would have to place the image into a “sandbox” S3 Bucket that would trigger the lambda. When triggered, the lambda would retrieve the image from the sandbox S3 Bucket, resize it against pre-defined image sizes based on the location of the image on the bucket, and store the resized image in the static S3 Bucket.
The Implementation
Firstly, we create three S3 Buckets. The first bucket is the images sandbox bucket which for this blog i’m going to name image-sandbox-test, a second bucket named site-images-test which will be configured as a static S3 Bucket used to serve the images, and a final bucket named image-processor-deploy which will be used by the Serverless framework as the lambda deployment bucket.

I use the Serverless framework along with Webpack for all lambdas I create. Doing so not only provides a nice development and deployment process but also allows me to organise my lambda code in single file modules. Serverless also provides the ability to use a number of convenient plugins for local development such as serverless-offline and serverless-s3-local.
Next we create the lambda. There isn’t much to be done in the lambda to retrieve the image from S3, to resize the image and to store the processed image in the static site bucket. Firstly, I provide a predefined set of image sizes based on the directory in the sandbox bucket that the images is stored in.

The available images sizes consist of the standard size for a banner and content image. The idea here is that when an image is placed into the banner directory of the image-sandbox-test bucket, the lambda will resize the image to 1400 by 350. The rest of the logic is small and simple. We retrieve the image from the sandbox S3 Bucket via the event passed into the lambda and determine the required image size before resizing the image and storing the processed image in the static site bucket.

There are a couple of things that need explaining in the above code. You will notice that there are a couple of process.env calls on line 19 and 28. We provide environment variables in the serverless.yml file and use them to allow us to create a lambda instance for each of our environments. Doing this also makes testing a little easier. On line 19 and 28, I also call the s3Service which is an external service that provides the ability to retrieve and store objects in S3. This logic has been placed in an external file for ease of testing. This has also been done for the sharp logic. The handler.js file makes a call to the sharpService on line 27. A check has also been added on line 21 to determine whether the original image width and height is less than the intended width and height when resized. Since this scenario would cause a reduction in image quality, the handler logs out an error and ceases to process the image.
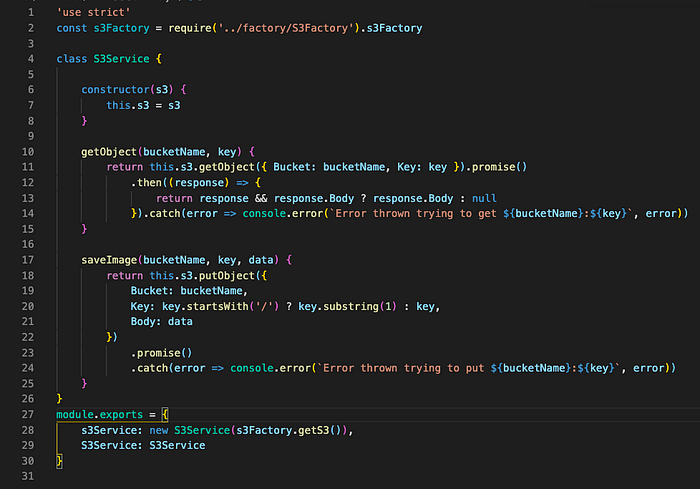
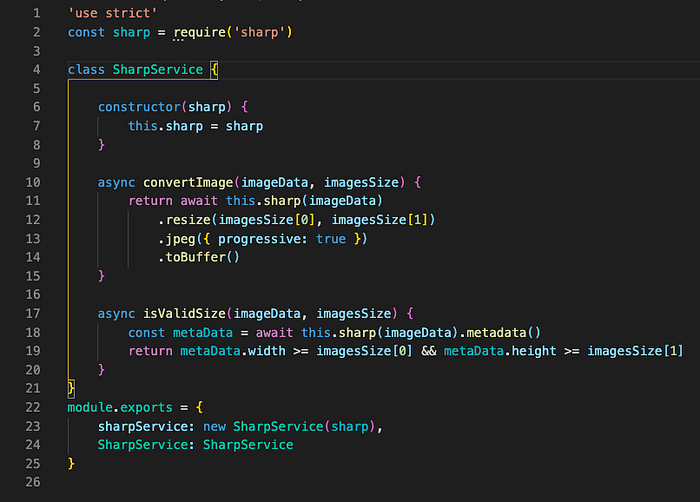
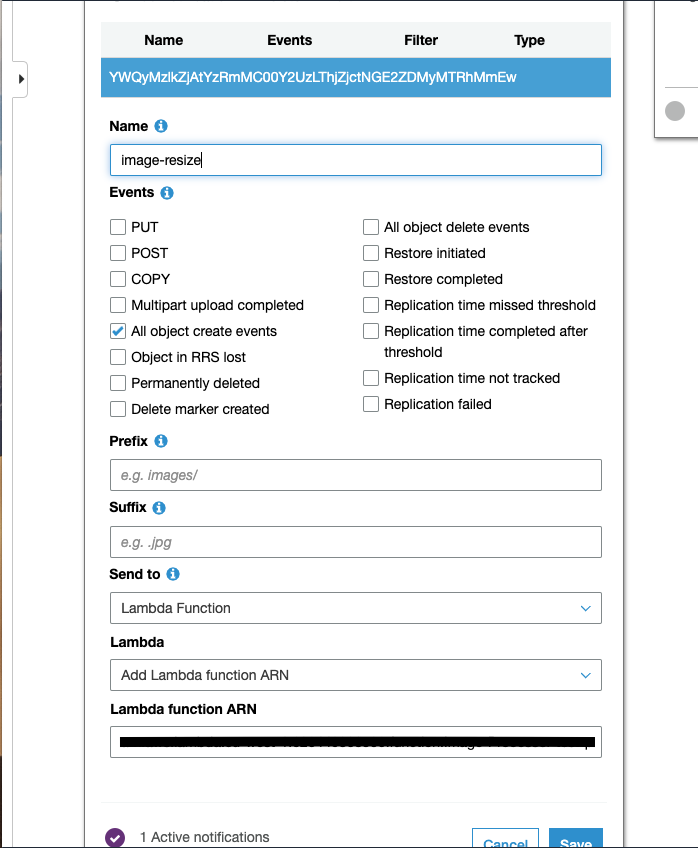
The s3Factory import in the S3Service.js file provides an instance of the AWS S3 Client. It has been externalised to allow the creation of the S3 client based on the environment. A host and port is provided when running the lambda in test and development environments. The final step is to configure and event on the image-sandbox-test bucket. This can be achieved by clicking on the properties tab of the bucket, then the events tile under the advanced settings. Create an event that triggers the lambda when an object is created. The event can be made stricter by configuring the suffix rules in the event so that the lambda is only triggered when .jpg or .png files are added to the bucket.
Resizing Images
Now that the S3 Buckets and lambda have been created, I can upload a file into the image-sandbox-test S3 Bucket and expect to see the resized file in the site-images-test S3 Bucket. For the purpose of this blog I sourced an extremely large image to resize. As you can see from the below screen shot the sourced image is 13.8MB in size with a width and height of 10800 and 5400 pixels respectively.
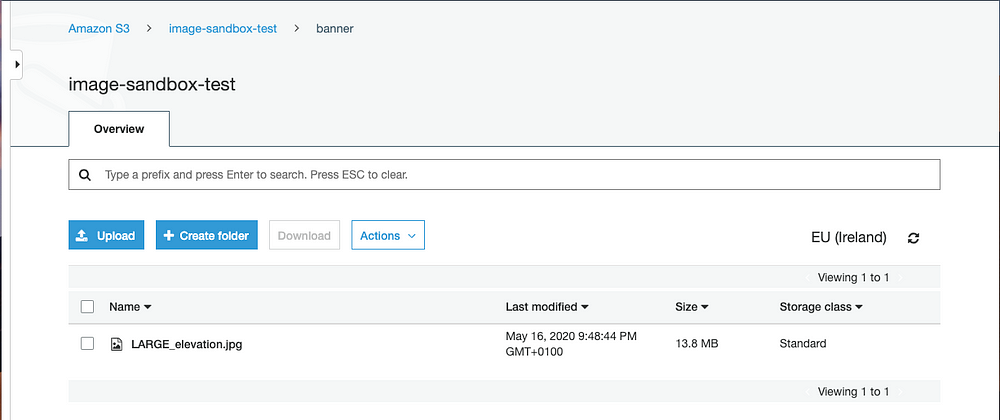
Once processed, the sourced image had been resized to the banner width and height of 1400 by 350 pixels with a size of 146.8KB.
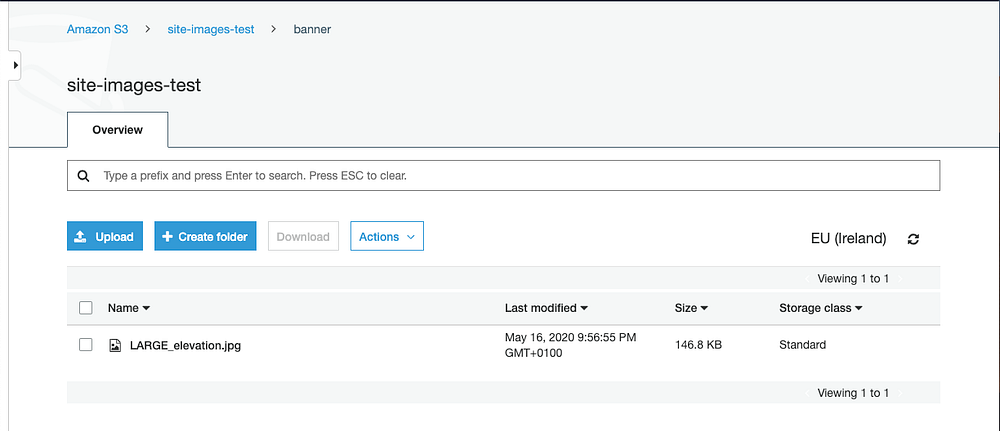
Image Format
I mentioned at the beginning of this article that it wasn’t only the size of the images that we are concerned with but also the format. The site generally only contains two image formats at present being jpeg and png. Since jpeg’s are a lot smaller than png’s, we would like to only allow content editors to use jpeg’s on the site. We can do this in the lambda by modifying the sharp logic to convert as well as resize.

Deploying the above change and uploading a png image into the image-sandbox-test bucket inserts the jpeg version of the image into the site-images-test bucket. The screen shot below shows that the original png image is 209.9KB in size.
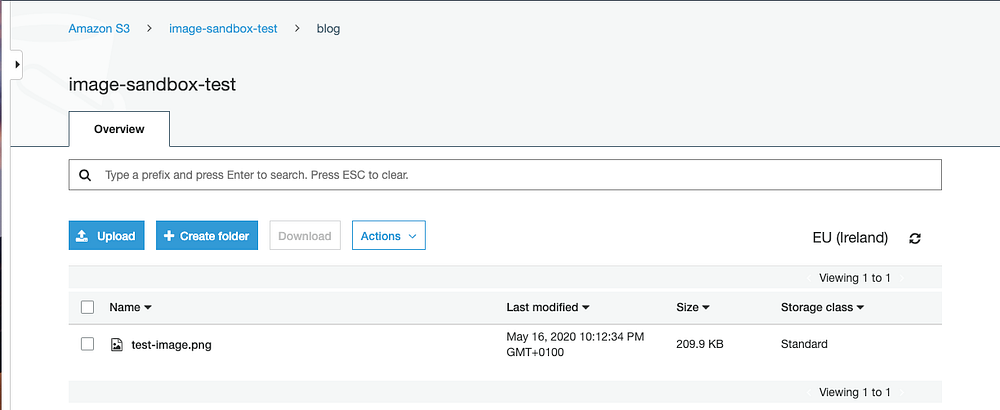
When processed and placed into the site-images-test bucket, the image size is reduced to 18.9KB.
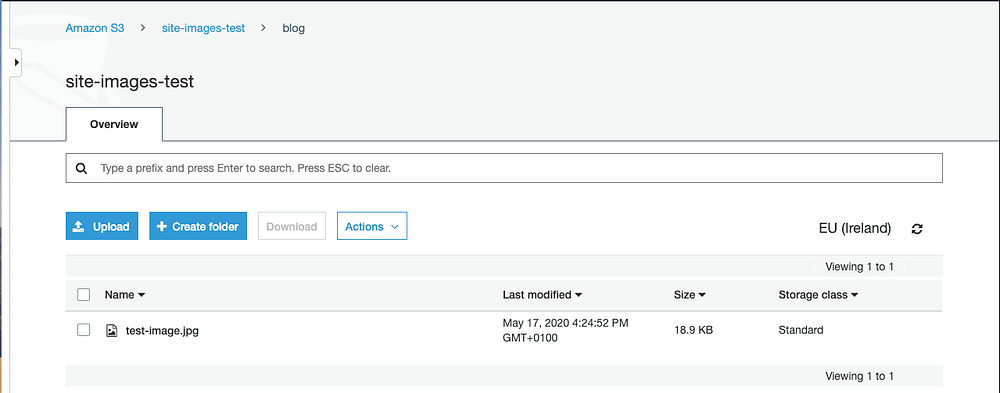
Converting all images on the site to jpeg and resizing them to a more appropriate size based on the purpose of the image will have a positive impact on the site with regards to page load.
The code for the image processing lambda can be found on GitHub.
